Are you a Vitamix owner but don’t know how to clean Vitamix container of the stains and stench accumulated over the years? Don’t feel bad, it happens to the best of us. You might have tried running a cleaning cycle and soaking it with vinegar, but those tough stains and the cloudy film still wouldn’t leave.
If you’ve ever experienced this problem and often find yourself wondering how to deep clean your Vitamix container so it looks good as new, you’ve come to the right place.
This article will show you quick and easy ways to clean Vitamix containers and remove all those tough stains and musky smells. So without further ado, let’s get right into it.
How to Clean Vitamix Container Properly
This method works for cleaning tough stains caused by fruits, vegetables, turmeric, oil, butter residue, smoothie stains, puree residues, and many other stubborn stains. It even works to get rid of odors.
So how does it work?
First, let’s make a list of items you’ll need. You’ll need:
- A bowl or small container.
- Baking soda
- A toothbrush or small scrub
- Warm water
- Vinegar (optional)
Step 1: Make a Baking Soda Paste
The first thing you want to do is to prepare a baking soda paste. Grab your bowl or small container and add a bit of your baking soda (one or two tablespoons should do it).
Then add a bit of warm water. Don’t add too much water because it could reduce the effect of your baking soda. Add just enough and mix until it becomes a thick paste.
Step 2: Scrub With Toothbrush
Next, grab your toothbrush, dip it in your paste and begin scrubbing the walls of your Vitamix container. Before starting this step though, you might want to pre-soak your container with vinegar or add a little vinegar to your baking soda paste. Although not a necessary step, it helps boost efficiency and makes the scrubbing process less cumbersome.
The stains should come off easily when you use baking soda with the added power of vinegar. Most times, the stains that remain on our containers aren’t really stains but mineral deposits left behind by the accumulation of dried water we didn’t clean off after washing our Vitamix container.
Step 3: Try Vinegar Soak
This is optional, but you can still try doing a vinegar soak after the baking soda scrub. But if you did this before the scrub, you don’t have to do it again.
Fill your Vitamix container to the brim with vinegar and let it soak for a few hours, then repeat the scrubbing process. Make sure you don’t pour out the water when scrubbing. Scrub the container with the vinegar still filling it up to the brim.
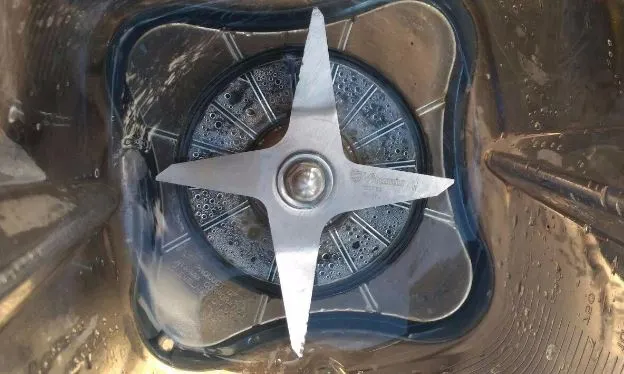
Step 4: Clean the Rubber Seal
If you’re using a smart system Vitamix with a clear lid, you’ll want to make sure your rubber seal is also clean. Over time, as you use your Vitamix continuously, dirt tends to get trapped beneath the rubber seal.
How do you clean it? It’s pretty easy. Grab a butter knife or other sharp object that you can use to pry open the rubber seal. You’ll see the build-up of dirt beneath the rubber seal. If left too long, the dirt can get quite clingy and stubborn. But no worries, as long as you still have your baking soda paste and toothbrush, you can still save your precious Vitamix container.
Grab your baking soda mix and toothpaste, and repeat the scrubbing process. Your lead would be good as new before you know it.
Once you’re done, make sure you dry off your container. Most times, we just wash our container and set it up on the counter without actually drinking it off. This makes the build-up of mineral deposits much faster, causing that cloudy film that makes our container look more white than clear.
Ensure that you wipe it with a clean towel before setting it up on your counter or in your cabinet.
Tips for Maintaining your Vitamix Container
Now you know how to clean your Vitamix container, but what are the best practices for keeping your container in great condition so you don’t have to deep clean it so often or encounter other problems? Here are a few tips that can help.
- Leverage the Sun
If you use your blender for fruits and vegetables or other substances that can give your container some colored stains, all you need is to bleach out the stain with sunlight. Simply wash your container as you normally would and leave it out on a window to dry out from direct sunlight. The sun would bleach out the stains off the walls of your container.
- Load in the Right Order
Make sure you load your blender correctly. Although this might sound unimportant, it is quite necessary for maintaining a clean and problem-free container. Unless otherwise stated by the recipe you are working with, you should load your blender in the following order.
- Liquids first (Water, milk, juice, yogurt)
- Soft substances next (powder, leaves, grains, seasonings, soft fruits)
- Frozen or hard ingredients last (Ice, veggies, hard fruits)
Having liquids at the bottom prevents air pockets from forming around the blades, and the weight of the heavy frozen or hard substances on top helps to push down the soft ingredients in the middle into the blades.
Loading in this order helps protect your blades and prevent them from stalling when making recipes with hard ingredients.
You can use this order for your 36 or 64-ounce containers.
- Use the Tamper
The tamper is your friend when blending recipes with hard ingredients. Instead of leaving all the work to your Vitamix blades, try using your tamper. Don’t be afraid of getting the tamper into the blades when blending. As long as you have the tamper on, you will never have to worry about hitting or jamming the blades.
Focus on pressing the ingredients down on the corners of your container. This helps get all the ingredients into the blades and relieves the blades from overworking.
Just remember to never fill your container more than two-thirds full when using the tamper.
- Use The Right Container
Remember to use the right kind of container depending on the kind of recipe you’re working with. Use either a wet container or a dry container where applicable.
What’s the difference?
A wet container, as the name implies, is used for blending wet substances or liquids. The blades are formed in a vortex and they make the liquids form a vortex when blending in order to pull all the ingredients into the blades and then back out in a repeated cycle, creating a smooth texture with your recipes.
The dry container, on the other hand, has reverse vortex blades. It tends to blast things up and around in the container to keep things more granular instead of liquid. So use the right kind of container depending on the recipe you are making.
- Remove Thick Ingredients
If you’re blending thick ingredients like nut butter or hummus, you should use an under-blade scraper to get ingredients out. It works like a squeegee for the sides of your container to get all the thick ingredients out of your container and from under the blades so that nothing is wasted.
It also helps prevent ingredients from sticking to the sides of your container, making it easier to wash off all the stains when you’re done.
Conclusion
Baking soda does a really good job of cleaning off all the residue that might have accumulated over time, making your container look good as new.
It’s really incredible how effective this method is and you can rest assured that you’ll see great results. You can use this method of cleaning your Vitamix container once or twice every month depending on how often you use your Vitamix blender.